
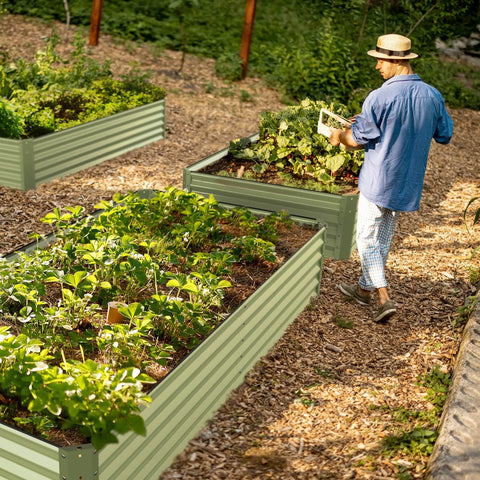
Enjoy fresh produce from spring to fall with our high bed planting plan and list.Planning a garden to successfully harvest your own produce is easy with this three-season plan for a raised bed. The layout of your garden can make or break your garden's success, so it's important to get it right. Follow these planting plans and lists for each season, and you'll enjoy a fruitful garden from early spring to fall. The following content also has some reference value for raised garden beds.
Sow for the spring harvest
Start planting your own produce in early spring. Check the date of the last spring frost of the previous season in your area. You can leave part of your garden unplanted so you can grow vegetables in warmer weather later.
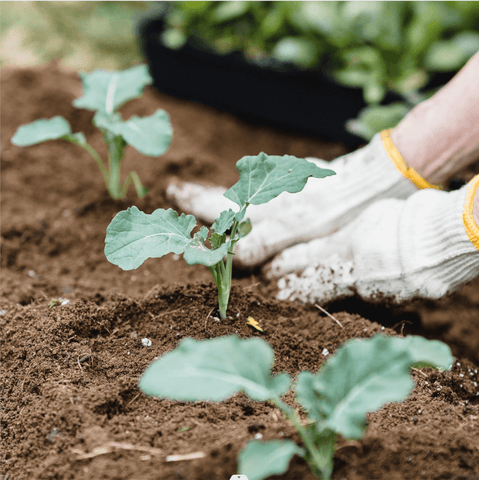
Early spring: Plant four weeks before the last frost date. Seed early spring vegetables directly into the soil, but for an early harvest, we recommend that you do some transplanting first. When planting seeds, plant them at a higher density than recommended, and then, when the seedlings are a few inches tall, use scissors to cut them thin to the recommended amount.
The 11 best seed Starter trays for 2023 to help jump-start your garden
- 8 butterhead lettuce
- 8 Leaf lettuce
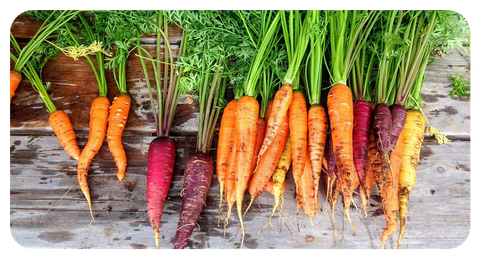
- 16 Carrots
Coriander or dill
- 2 Broccoli
- 1 Cabbage
- 2 Cauliflower
- 12 snow peas (planted in a circle around a tall tomato cage or trellis)
- 4 Spinach
- 2 Parsley
- 8 Onions
- 16 Radish
- 4 Swiss chard or kale
Spring list
- Keep the seedbed moist (but not muddy) so the seedlings don't dry out when they sprout. Spray water gently.
- Use a tomato cage or trellis to support snow peas.
- Pull weeds when you find them.
- Cover your garden with a clean bale of straw, a bag of chopped leaves from last fall, cut grass, or other form of organic mulch. Put a two-inch layer of mulch around the seedlings, but don't cover the seeds you just planted, or they won't grow.
Sow for the summer harvest
After the last frost, the weather and soil are warm enough to grow warm summer vegetables like tomatoes, peppers and green beans. Herbs are also doing well now.
Late spring: Plant these vegetables in late spring, two weeks after the last frost date.
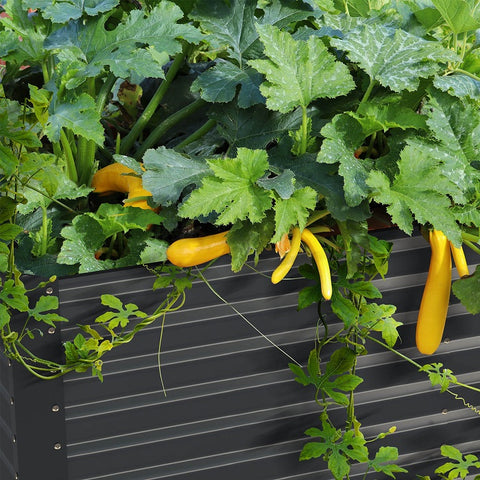
Transplant tip: Some vegetables need space, while tomatoes in doubt need a large cage. Summer squash, cucumbers and lentils can all be grown on 6-foot trellises at the edge of the garden. Make sure they don't shade other plants.
- 8 clumps of green beans
- 8 Carrots
- 1 cherry tomato (try "Husky Cherry Red" or "Patio")
- 1 Cabbage (not harvested in early Spring)
- 1 salad tomato (try "Rutgers" or "Better Bush")
- 12 Snow Peas (not harvested in early spring)
1 Bell pepper (try "Gypsy Half-blood," "California Miracle," "Albino," or "Bell Boy")
- 2 Parsley
- 8 Onions
J.4 Basil
- 4 Swiss chard or kale
Summer list
- Use mulch around vegetables, especially tomatoes, to keep the soil moist and reduce weed problems.
- Keep tomatoes in stakes or cages, even if you choose smaller, established varieties that are being produced at the same time. Place stakes or cages in place immediately after planting so that the plant is supported as it grows. Peppers usually need support, too.
- Spend a few minutes a day in the garden. The surface of the soil can be dry, but don't let it be so dry that the plants wilt.
Sow for the fall harvest
Once the weather cools, crops that prefer cooler weather can become a part of your garden again. Continue harvesting tomatoes, peppers and beans.
Late summer: Plant these vegetables in mid-summer to late summer, eight weeks before the first average fall frost date.
Garden planning: Fall gardens are often overlooked by gardeners who plant such large spring gardens that it can be difficult to keep up with the entire season. With such a manageable plan, you'll have the time and energy to keep planting and extend your harvest in the fall.
- 1 cabbage
- 12 bush green beans
- 16 Carrots
- 4 Broccoli
- 2 Cauliflower
- 1 cherry tomato
- Salad Tomatoes 1 count
- Spinach
1, 1 sweet pepper
- 2 Parsley
- 2 Drilling rig
- 4 Coriander
- Basil
Swiss chard or kale
Autumn list
- Renew mulch around plants as needed. Continue to go to your garden every day to harvest and weed. Even if it's autumn, watch out for warm and windy days, which can dry out the vegetable patch quickly. If it's windy, you may need to water twice a day.
- Watch out for harmful insects. Your garden is small enough that it's easy to pick and crush them when you find them.
- After the first frost, remove dead plants and spread an inch of compost or compost fertilizer over the bed. Then, your garden will be ready for you again in the spring.
5 pet-friendly ways to remove weeds from your yard
Want to control unwanted plants without hurting your furry family? Check out these pet safe ways.
When weeds become a losing battle, you may want to resort to a strong herbicide. Unfortunately, many chemicals used against pesky plants are not pet-safe herbicides. Even "eco-friendly" or natural herbicides can cause harm when misused. Add in a dog that likes to dig holes in your lawn or garden and roll around, and you risk harmful effects.
In fact, even just frolicking in the grass can pose a threat, as your furry friend can pick up herbicides and other pesticides while walking across the yard. The chemicals get transferred to their PAWS and fur, and they may inadvertently ingest them while grooming themselves.
So, if you have pets, are you doomed to overgrown weeds in your yard? Not necessarily. There are pet-friendly herbicides and lawn care strategies that can reduce leaf invaders without threatening the animal's health. Here's what you need to know to keep your pet safe while preventing weeds.
Before you waste time, effort, and money on ineffective products or chemicals that put your pet at risk, assess your tolerance to weeds. Can you stand a little bit? Some lawn weeds are not a problem - as long as you make an effort to keep the grass healthy, those unwanted plants are less likely to get out of control. Also, mulching garden beds regularly prevents weeds from taking over ornamentals.
If you want to keep your lawn and garden completely weed-free, you need to think carefully about what methods or chemicals to use in your yard.
Step 1 Weed by hand
The most effective way to eradicate weeds in lawns and gardens is to remove them by hand. This can be tedious work, but it's the best way to make sure you eliminate the roots of your plant. (Herbicides, both toxic and non-toxic, leave roots to regenerate; Dandelions, in particular, have long roots.)
There are many handy weeding tools on the market to speed up the weeding process, so if your problem is sporadic weeds, this is a fairly reliable way to treat them without using chemicals. It is best to view hand weeding as an ongoing practice that is most effective at the beginning of spring. In a garden bed, you can eradicate weed seedlings by hoeing the ground.
Another major benefit of hand weeding is that you can have a choice - only the plants you want to kill will be affected. Unfortunately, most environmentally friendly herbicides and weeding methods are not picky; They will kill or damage any plant they come into contact with.
- Choking weeds
Like any plant, weeds need sunlight to thrive. So if you deny them access to light, they will die. The easiest way to smother them: lay down a thick layer of organic mulch (3 to 5 inches), such as wood shavings or pine needles. (Avoid cocoa mulch, which can be toxic to dogs if eaten.) The covering allows water and air to pass through, but not sunlight. As a result, your soil will remain healthy; Small weeds and seeds hidden under mulch will not survive.
When creating a new garden, you can spread opaque plastic sheeting, layers of cardboard, or pieces of carpet over the areas where you want to kill all the plants. Leave the layers in place for about six weeks during the growing season to effectively suppress weeds. Avoid tilling the soil afterwards to prevent weed seeds from germinating.
Step 3 Apply garden vinegar
Concentrated vinegar will kill young plants. Keep in mind that gardening vinegar is a non-selective killer, meaning it will damage any plant it comes into contact with. Also, be aware that it is a strong acid, so avoid contact with your skin, eyes, or nose. (Make sure you wear gardening gloves!) Read and follow label instructions carefully to keep your pet away from the handling area until the vinegar is dry.
This method is especially effective for cracks in the sidewalk or driveway. But don't be discouraged if the first spray doesn't work: Since garden vinegar only damages the plant tissue it comes into contact with, the weeds that grow may not die until you've sprayed it a few times.
Using garden vinegar may sound like a money-saving idea, but it's not. Concentrated vinegar kills weeds and is just as expensive as standard commercial herbicides.
- Burning or boiling weeds
If occasional weeds are your problem -- think of those pesky shoots that pop up between patio paving stones or in cracks in your driveway -- try burning them with a welding torch or boiling them. Just be careful not to hurt yourself in the process! Note that these methods will not kill the weed roots and may need to be repeated several times over the summer.
- Other natural or organic options


