
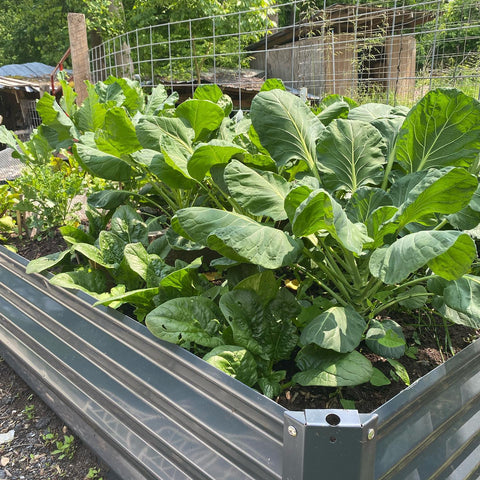
The sun-kissed months of summer bring forth a bountiful harvest of fresh, vibrant produce from your garden. However, with abundance comes the need for careful preservation to ensure you can savor the flavors of summer all year round. Canning and proper storing techniques are your allies in keeping the essence of the season alive even when winter's chill sets in. In this comprehensive blog post, we'll dive into the world of preserving the bounty, offering you a guide to successful canning and storage that will enable you to enjoy the taste of summer's goodness long after the warm days have passed.The following content also has some reference value for raised garden beds.
The Art of Canning: A Gateway to Flavorful Preservation
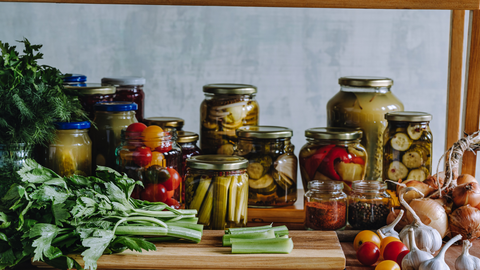
Canning is a time-honored tradition that transforms your home-grown fruits, vegetables, and even prepared dishes into preserved delights that retain their taste and nutritional value.
Understanding Canning Basics: Two Methods
- Water Bath Canning
Water bath canning is suitable for high-acid foods like fruits, jams, jellies, and pickles. It involves submerging filled jars in boiling water for a specified period to kill bacteria and create a seal.
- Pressure Canning
Pressure canning is used for low-acid foods like vegetables, meats, and soups. It requires a pressure canner to reach higher temperatures and eliminate harmful microorganisms.
Tips for Successful Canning
- Cleanliness is Key
Ensure your equipment, jars, and lids are thoroughly cleaned and sterilized before use to prevent contamination.
- Proper Seal Inspection
After canning, check that the lids have been sealed by pressing the center of each lid. A properly sealed lid will not flex and will not make a clicking sound when pressed.
- Label and Date
Label each jar with its contents and date of preservation. This helps you keep track of freshness and ensures you use the oldest jars first.
- Storage Conditions
Store your canned goods in a cool, dark, and dry place to extend their shelf life. Avoid storing jars near heat sources or in direct sunlight.
Freezing: A Convenient Alternative
Freezing is a quick and simple method to preserve the flavors of summer. It's particularly useful for fruits, vegetables, and herbs.
Tips for Successful Freezing
- Blanch Before Freezing
Most vegetables should be blanched—briefly boiled and then immediately cooled in ice water—before freezing. This process helps retain color, texture, and flavor.
- Use Airtight Containers
Use airtight containers or freezer-safe bags to prevent freezer burn. Remove as much air as possible before sealing to maintain freshness.
- Label and Date
Just like with canning, label your containers or bags with the contents and freezing date for easy identification.
- Proper Thawing
Thaw frozen produce in the refrigerator or in cold water. Avoid thawing at room temperature to prevent bacterial growth.
Drying: A Space-Efficient Option
Drying or dehydrating fruits, vegetables, and herbs removes moisture, effectively preserving their shelf life and concentrated flavors.
Tips for Successful Drying
- Choose the Right Produce
Opt for fresh, high-quality produce. Overripe or damaged items won't yield the best results.
- Uniform Slicing
For even drying, slice the produce to a consistent thickness. Thinner slices dry faster and more evenly.
- Use a Dehydrator or Oven
Invest in a dehydrator for efficient drying, or use your oven on its lowest setting with the door slightly ajar.
- Store in Airtight Containers
Store dried produce in airtight containers in a cool, dark, and dry place. Vacuum-sealed bags are also effective at maintaining freshness.
Root Cellaring: A Traditional Storage Method
Root cellaring is an old-fashioned technique that utilizes the natural temperature and humidity regulation of the earth to store produce.
Tips for Successful Root Cellaring
- Choose the Right Produce
Root vegetables like potatoes, carrots, and onions are ideal for root cellaring. Make sure the produce is free of bruises and blemishes.
- Select an Appropriate Location
Find a cool, dark, and humid space for your root cellar, such as a basement or an underground storage area.
- Use Proper Storage Containers
Use wooden crates, cardboard boxes, or burlap bags to store your produce. Ensure good ventilation to prevent mold growth.
Storing Tips for Home-Grown Produce
- Temperature and Humidity Awareness
Different types of produce have varying temperature and humidity preferences. Store fruits and vegetables with similar requirements together.
- Separate Ethylene Producers and Sensitives
Some fruits release ethylene gas, which can cause other produce to ripen or spoil faster. Keep ethylene-producing fruits away from ethylene-sensitive items.
- Inspect and Rotate
Regularly inspect stored produce for signs of spoilage and remove any affected items. Rotate your stock to use older items before newer ones.
- Consider Shelf Life
Be mindful of the shelf life of different produce. Consume more perishable items sooner and save longer-lasting ones for later.
- Avoid Refrigeration for Certain Items
Not all produce benefits from refrigeration. Tomatoes, for example, can lose flavor and texture when stored in the refrigerator.
Conclusion
Preserving the bounty of your summer harvest through canning, freezing, drying, and root cellaring is a labor of love that rewards you with the flavors of the season throughout the year. By mastering these preservation techniques and following storage tips, you can enjoy the taste of your garden's hard work even when the snow falls and the days grow shorter. Embrace the art of preservation as a way to extend the warmth of summer and share its wholesome goodness with friends and family. Your pantry and storage spaces become a treasure trove of memories, flavors, and the satisfying knowledge that you've truly made the most of nature's generous offerings.


