
Use these DIY instructions to make your own vegetable growing box. The following content also has some reference value for raised garden beds.
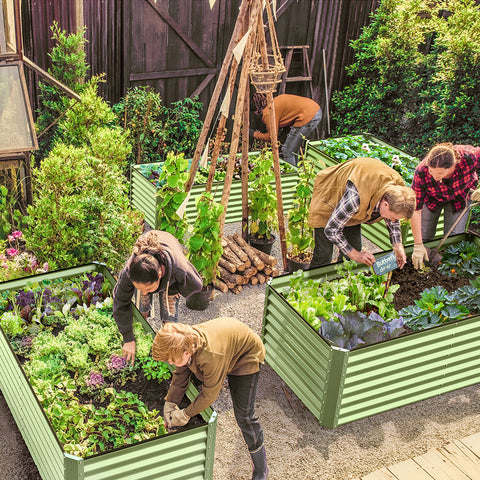
A raised garden bed - essentially a large planter box - is the ultimate problem solver: it provides perfect drainage, protection from pests, and easy access to crops. It can turn your backyard into the farm of your dreams. Follow our instructions and you can make a 4-by-8-foot bed on weekends.
Perfect raised bed
If you realize you want something simpler, we have a few tips to help you complete a high bed faster. If you're looking for a building challenge, you'll want to read how to create a Straw isk, the coolest and most impressive planter ever made. Design by Sunset Garden editors Johanna Silver and Lauren Dunec Hoang
Materials and tools
material
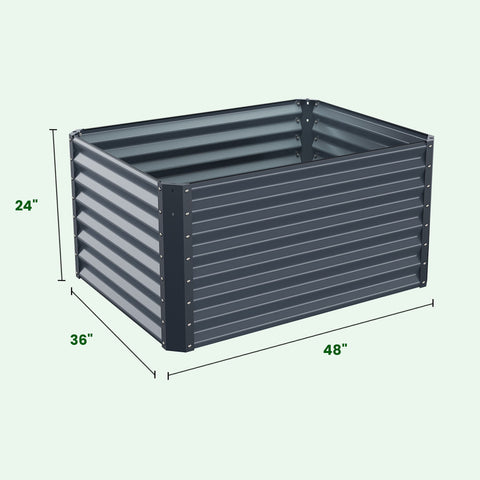
- Four 16-inch lengths of 4 x 4 x 4, for corner posts
* Two 4 foot long 2 by 12 bed ends
- Two 8ft long 2x12 bedsides
- 24 3 1/2-inch #14 galvanized or stainless steel screws
24 1/2 inch #8 galvanized or stainless steel screws; optional
- Six 12-inch pieces of 1/2-inch PVC pipe; optional
- Three 10-foot lengths of 3/8 gauge rebar; optional
- Three rolls of 1 ⁄ 4-inch mesh hardware cloth 3-5 feet wide to prevent animals from digging; optional
- 12 1-inch galvanized pipe strips; optional
- 1 roll bird net or floating row cover; optional
- 16 cubic feet of planting soil
16 cubic feet of compost
- drip irrigation system; optional
tool
- Drill
- 5/32 inch drill bit
- Pencil
- Ruler
- Shovel or trowel
- Level (optional)
- Gloves
- Stapler
- Wire cutters
- Four adjustable wood bar clips :2 short (12 inches) and 2 long (6 feet); optional
* Note on wood: For our side panels and end panels, we chose sustainably harvested "building Heart" - or con Heart mahogany that we order at the lumberyard. The center is cut from the center of the log and is the least perishable. We used planks 12 inches wide, which gave us a full foot of space for the roots to thrive. To save time, we asked the mill to cut the wood to the length we needed. (If you're cutting it yourself, you'll need a woodsaw, hand saw, or table saw. Be sure to measure twice and cut once, as each piece of wood will often vary slightly in their listed length, and you'll need to measure exactly both sides and ends of your bed.)
frame
You have to fold up the bed. Working on a flat surface (such as a patio), place a 4-foot-2-by-12-inch board on the narrow side edge of the sidewalk; At one end of the board, place a 16-inch 4-by-4 corner post flush with one end of the board. Use two adjustable woodworking jigs -- or a buddy -- to keep the sides and bottom of the two pieces of wood flush.
Tool connection
Before attaching the post to the 4-foot board, pre-drill three evenly spaced holes in the board with a 5/32 inch drill bit to prevent the wood from splitting. Then attach the board to the post using three 3.5 "screws. (Once the board is secured to the post, you can remove the woodworking jig if using it.)
Repeat completion
Now that you've mastered the technique of adding posts from the previous step, repeat the technique by installing a corner post at the other end of the 4-foot board. Then grab the remaining 4 feet of the board and attach a corner post to each end.
Now that you have the two 4-foot ends of the raised bed, and are ready to join the long sides of the bed: Place the first 8-foot-2-by-12-foot side panel between the two ends of the bed. Make sure the 8-foot boards are flush with each corner post (secure them with a woodworking jig, or grab the guy again), then pre-drill 3 holes at the end of each board and secure it to the post with 3 3.5 "screws. Repeat attaching the remaining 8 foot side panels to the waiting corner posts.
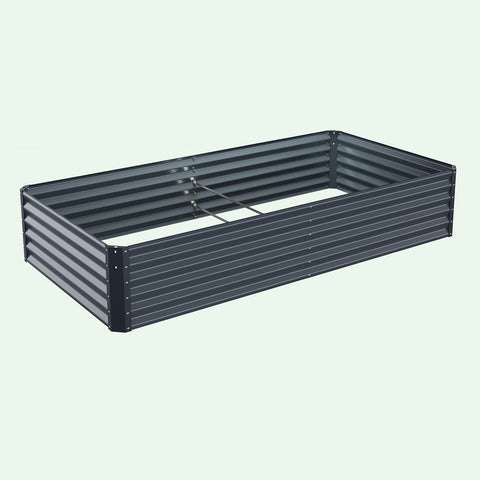
Your rectangular raised bed is now complete!
Solar position
With the help of a friend, turn the bed over and put it in place. If you plan to grow vegetables, choose a spot in your garden that gets plenty of sunshine -- at least six hours a day. A north-south bed will give you even sunlight.
Fixed bed
Once you've decided on the bed location, dig a hole in each corner post 5 to 6 inches deep. Then bury each pillar in the ground.
Smooth out the bed
Make sure all sides of the bed are level (use a level if you have one); This will ensure even irrigation penetration. Then backfill the corner holes with dirt to stabilize the posts.
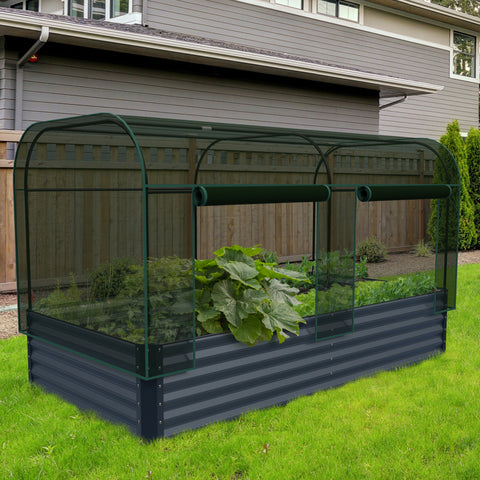
Bird and frost proof
To give your vegetables an edge over birds and frost, consider adding rings to support bird nets or floating row hoods. If you want to add these three optional hoops, attach their PVC support pipes now (before you fill the bed with dirt).
Here's how: On the inside of each long side (8 feet) of the raised bed, leave three 12-inch 1/2 inch PVC pipes evenly. Place these pipes vertically on either side of the bed, making sure that each PVC pipe has a parallel pipe mirrored on the bed (so that each pair of pipes can act as a support pipe for the hoop).
Attach each PVC pipe vertically to the inside of the bed using two tubing straps, each using two 1/2 inch screws.
Prevent drilling pests
You don't want to share your vegetables with gophers and moles. If they are a problem in your area, prevent them from getting into your raised bed by adding a layer of hardware cloth before you pour on the planting soil.
To do it: Rake the existing soil under the bed and tamp it down. Put on gloves and line the bottom of the bed with hardware cloth, making sure it lies flat on the bottom of the bed and bends upward to touch the sides of the bed. Attach the cloth to both sides of the bed. Use wire cutters to trim excess fabric and help the fabric fit into the corner post.
Add soil
Use a 50/50 mix of planting soil and compost. (You can buy them in bags at garden centers, and you can often save money by buying in bulk at your local soil farm.) Once the seedbed is filled, rake the soil and moisten it with a gentle spray from a hose.
Set irrigation
If you have a drip irrigation system, simply connect this bed to your existing irrigation line. To evenly cover the 4 x 8 foot bed, we added 1/4 inch emitter lines (12 inches apart) to the 1/2 inch tubing.
More: How to Set Up Your Own Drip Irrigation System
Plants!
Your bed is ready to grow fruits, herbs, and vegetables. Learn how to grow an edible garden with our guide.
Protect your crops
To cover newly planted seedlings with bird netting or seasonal floating row covers, hoops can be added to PVC pipe supports on the bed. Make a hoop: Bend a 10-foot length of 3/8 gauge rebar into a semicircular arc, then tuck the ends of the hoop into the PVC pipe bracket.
Reuse the remaining rebar to form and secure the two hoops. Then cover all three loops with a bird net or hood.
Sunset your own gardening tools
Foldable garden seat with tools
Whether you're growing your own food or planting flowers to attract the neighbors, gardening can be hard on your body. Our folding garden seats, featuring neatly embroidered sunset signs, reduce the stress of constantly kneeling or squatting. In addition, it also comes with five basic tools and pockets to keep them in hand.
Fisher Blacksmith Garden cultivator
This elegant rake is perfect for removing dirt and weeds! Tips are ideal for working with grasses and other weeds that have shallow, rhizomes, or running-type growths. The carefully curved side tips open slightly below the wreath to create a beautiful iris image. Solid steel rivets are set horizontally in the direction of pressure to provide additional stability for the rake.
Garden tote bag with tools
If your garden has a lot to tend to, you'll need something to carry around with you - like, well, this kit! It's durable, emblazoned with a sunset sign, and comes with two shovels and a cultivator, not to mention space to carry more.
Vintage sunset cover Personalized Garden flag


