Microgreens, the tiny, vibrant greens that are packed with flavor and nutrition, have been taking the culinary world by storm. While they can be grown in various containers, one of the most efficient and productive methods is to cultivate them in raised beds. In this comprehensive guide, we will explore the world of growing microgreens in raised beds, including the benefits, step-by-step instructions, suitable varieties, and tips to ensure your microgreens thrive.

The Marvels of Microgreens
Microgreens are young, edible plants that are harvested at an early stage of growth, typically within 7-21 days after germination. These petite greens are not just visually appealing but also incredibly nutritious. They come in a dazzling array of colors and flavors, making them a favorite among chefs and home cooks alike.
Here are some reasons why microgreens have gained popularity:
Nutrient Density
Despite their small size, microgreens are nutrient powerhouses. They are rich in vitamins, minerals, and antioxidants. In some cases, they can contain higher concentrations of these nutrients compared to their mature counterparts.
Flavor and Texture
Microgreens offer intense and diverse flavors, ranging from peppery arugula to earthy beet greens. Their tender, delicate textures add a gourmet touch to salads, sandwiches, and garnishes.
Quick Growth
Microgreens have a rapid growth cycle, making them one of the quickest crops to harvest. This means you can enjoy homegrown greens in a matter of weeks.
Compact Size
Microgreens can be grown in small spaces, making them an excellent choice for urban gardeners or those with limited room for traditional gardening.
Why Choose Raised Beds for Microgreens?
Raised beds offer several advantages for growing microgreens, making them an ideal choice for both beginners and experienced gardeners.
Improved Drainage
Raised beds are typically filled with well-draining soil, which is crucial for preventing waterlogged roots and fungal issues in microgreens. Proper drainage promotes healthy growth.
Better Soil Quality
Raised beds provide you with better control over the soil's quality. You can amend the soil with organic matter, compost, and other nutrients to create the perfect growing environment for your microgreens.
Less Bending and Stooping
Working in raised beds means less bending and stooping, making it easier on your back and knees, especially when planting and harvesting microgreens frequently.
Pest and Weed Control
Raised beds can be equipped with barriers like netting or row covers to protect your microgreens from pests. Their height also helps deter ground-dwelling pests like slugs.
Aesthetically Pleasing
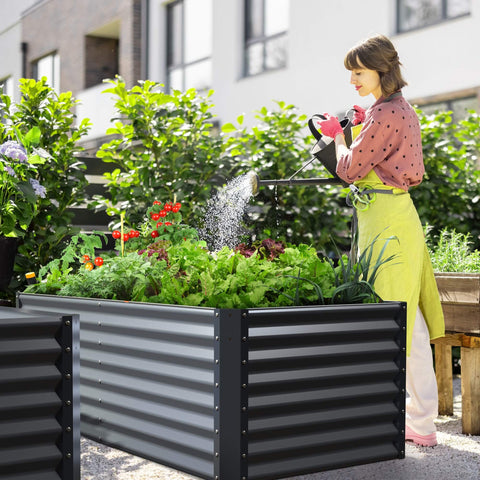
Raised beds add an organized and visually appealing element to your garden. They can be designed to fit your garden's aesthetic, and you can even grow multiple microgreen varieties in a single raised bed for a colorful display.

Choosing the Right Raised Bed for Microgreens
When selecting or building raised beds for growing microgreens, consider the following factors:
Size and Height
The size and height of your raised bed should suit your available space and your preferences. A standard raised bed is often around 8-12 inches in height, but you can adjust this based on your needs.
Material
Raised beds can be made from various materials, including wood, metal, plastic, and concrete. Choose a raised bed that offers durability and ease of customization, like metal or galvanized. And ensure that the material is safe for growing food.
Location
Choose a sunny location for your raised bed, as microgreens require plenty of light for optimal growth. Ideally, the spot should receive at least 4-6 hours of direct sunlight each day.
Accessibility
Consider the accessibility of your raised bed. Ensure that you can comfortably reach all parts of the bed for planting, maintenance, and harvesting.
Soil
The soil in your raised bed should be well-draining and rich in organic matter. You can create a custom soil mix by combining garden soil, compost, and other organic materials.
Step-by-Step Guide to Growing Microgreens in Raised Beds
Now that you've selected the right raised bed for your microgreens, let's go through the steps to successfully grow these nutrient-packed powerhouses.
Step 1: Prepare the Raised Bed
- Ensure your raised bed is clean and free of debris.
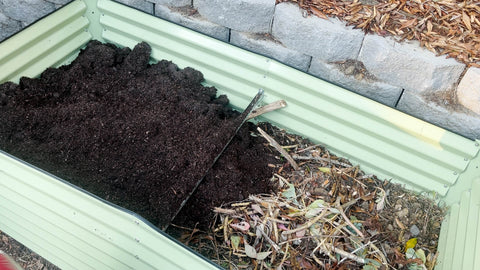
- Fill the bed with a well-draining potting mix or a custom soil blend that is rich in organic matter.
Step 2: Select Microgreen Varieties
Choose the microgreen varieties you want to grow. Some popular options include:
- Arugula
- Radish
- Basil
- Cilantro
- Kale
- Mustard greens
Feel free to mix and match varieties to create a colorful and flavorful microgreen garden.
Step 3: Sow the Seeds
- Scatter the microgreen seeds evenly over the prepared soil surface. You can be quite liberal with your seed distribution, as microgreens are typically grown densely.
- To make sure the seeds have proper soil contact, gently press them into the soil.
- Sprinkle a bit of soil or vermiculite over the seeds to lightly cover them. This helps maintain moisture during germination.
Step 4: Water and Cover
- Water the soil gently but thoroughly, ensuring it's evenly moist. You can use a spray bottle or a gentle shower from a watering can to avoid displacing the seeds.
- Cover the raised bed with a clear plastic lid or a plastic wrap to create a mini-greenhouse effect. This helps retain moisture and warmth, aiding germination.
Step 5: Germination
Place the raised bed in a sunny location with good airflow. Check the soil moisture regularly, and water as needed to keep it consistently moist but not waterlogged.
Step 6: Remove Cover
Once the microgreens have germinated and reached a height of about an inch, remove the plastic cover. This allows for proper air circulation and prevents mold growth.
Step 7: Maintain Moisture
Continue to water your microgreens regularly to keep the soil consistently moist. Use a gentle spray or a watering can with a fine nozzle to avoid dislodging the delicate seedlings.
Step 8: Harvest
Microgreens are typically ready for harvest within 7-21 days, depending on the variety and growing conditions. Harvest by snipping the greens just above the soil surface using clean scissors or shears.
Step 9: Enjoy
Use your freshly harvested microgreens to enhance the flavor and nutrition of salads, sandwiches, wraps, and a variety of dishes. Their vibrant colors and flavors are sure to elevate your culinary creations.

Tips for Successful Microgreen Cultivation
To ensure a successful microgreen harvest, consider these helpful tips:
Even Seed Distribution
Ensure that you distribute the seeds evenly to prevent overcrowding, which can lead to competition for resources and hinder growth.
Adequate Airflow
Good airflow is essential to prevent mold and mildew growth. Proper spacing between plants and the removal of covers at the right time can help maintain airflow.
Consistent Moisture
Maintain consistent soil moisture levels. Avoid overwatering, which can lead to rot, and underwatering, which can stunt growth.
Appropriate Lighting
Microgreens thrive in bright, indirect sunlight. If growing indoors, consider using grow lights to provide the necessary illumination.
Successive Plantings
To enjoy a continuous supply of microgreens, stagger your plantings every few weeks.
Troubleshooting Common Issues
While growing microgreens in raised beds is relatively straightforward, you may encounter some common issues:
Mold or Damping-Off
Excessive moisture or poor airflow can lead to mold or damping-off, a fungal disease that affects seedlings. Ensure proper ventilation and avoid overwatering.
Leggy Growth
If microgreens are reaching for the light and growing tall and spindly, they may not be receiving enough light. Adjust the light source or provide more direct sunlight.
Pests
Watch out for common pests like aphids and flea beetles. You can deter them with physical barriers, such as row covers or neem oil sprays.
Conclusion: A Flavorful and Nutrient-Rich Journey
Growing microgreens in raised beds is a rewarding and enjoyable endeavor that allows you to savor the flavors of fresh, nutrient-packed greens right at home. With the right setup and care, you can turn a small outdoor space or even a sunny windowsill into a vibrant microgreen garden. These tiny powerhouses are not only delicious but also a testament to the joys of home gardening and the incredible flavors that come from nurturing your own edible creations. So, grab your seeds, prepare your raised bed, and embark on a flavorful and nutrient-rich journey with microgreens. Your taste buds and your health will thank you.


