Freshly picked bell peppers add a sweet and crisp crunch to summer dishes like kebabs, grilled peppers, salads, and salsas. With a bit of planning and extra care, you can enjoy a bountiful harvest of your own homegrown bell peppers this season.
Choosing Pepper Plants to Grow
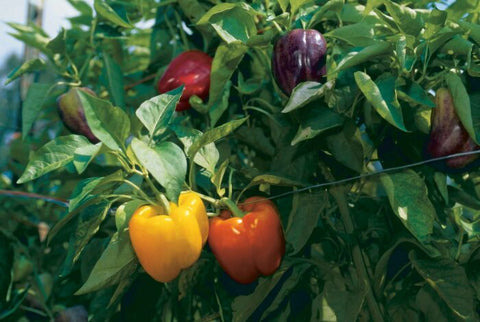
Opting for nursery-grown pepper seedlings is a straightforward and instantly gratifying way to introduce bell peppers to your garden. Those who favor classic varieties like the tried-and-true "California Wonder" should find them readily available at local gardening centers. For those seeking adventure, specialty seed nurseries offer a variety of colors, sizes, shapes, and flavors. However, careful consideration of factors such as the time to harvest, resistance to common diseases, and preferred pepper types is essential.
Starting bell pepper seeds indoors during the winter ensures that the seedlings are ready to move outdoors when spring temperatures rise. Although tempting to plant outdoors during early spring's 80-degree weather, it's best to wait until all frost risks have passed to prevent any cold damage. Consult your state extension service to determine the average last frost date in your region. While peppers can tolerate temperatures above 50 degrees, they thrive better in conditions exceeding 75 degrees.
Indoor Seed Starting for Bell Peppers
The duration between planting pepper seeds and harvesting pepper fruits can be surprisingly long in most regions. Starting pepper seeds indoors makes sense for many as it allows the seedlings to leap into the growing season. Sow pepper seeds 8 to 10 weeks before your region's average last frost date, ensuring the potting soil is moist before planting. Sprinkle seeds on the soil surface, lightly cover with more potting mix, and use a seedling heat mat to expedite germination. Place pots under grow lights or near bright windows. If your pepper seedlings appear leggy, stretching, it indicates insufficient light.
Once seedlings develop their first set of true leaves, they can be transplanted into their individual pots. These young plants do not require larger containers than standard 4-inch pots. Gently lift the plants from the potting soil using a pencil or similar tool, being careful not to damage the roots or stems. Hold onto a leaf rather than the stem to avoid breaking it. Be cautious when covering the roots with potting mix and give the plant a good drink.
Moving Bell Pepper Seedlings to the Garden
Start "hardening off" your pepper seedlings a week or two before outdoor planting. Simply place the pots outdoors in warm weather (above 50 degrees) and sheltered from wind during the day, bringing them back indoors at night. Once all frost risks have passed, and nighttime temperatures are consistently above 50 degrees, your young peppers are ready to move into the garden.

Of course, you don't have to start peppers from seeds. Healthy pepper seedlings are available for purchase at local garden centers. Choose plants without stem lesions, leaf spots, or broken branches, and their height should be less than a foot with sturdy stems, akin to a pencil's width.
Planting Pepper Seedlings in the Garden
Plant seedlings at the same level as they were in their pots. Avoid planting too deep or leaving the root ball exposed. Mature sizes may vary by variety, so check the seed packet or plant label for spacing information. Most types of bell peppers can be spaced about 2 feet apart.
Watering Requirements
Consistent watering is key to healthy, productive bell pepper plants. In the first week or so, saturate the soil around the base of the stem every other day while the seedlings acclimate. Water every few days thereafter, training the roots to seek moisture deeper in the soil profile, enhancing the plant's resilience in hot summer weather.
Fertilizing as Needed
Refer to the recommendations in your soil test report to determine the type of fertilizer and application frequency. Be cautious not to overuse nitrogen, as it promotes excessive leaf growth at the expense of flower and fruit development.
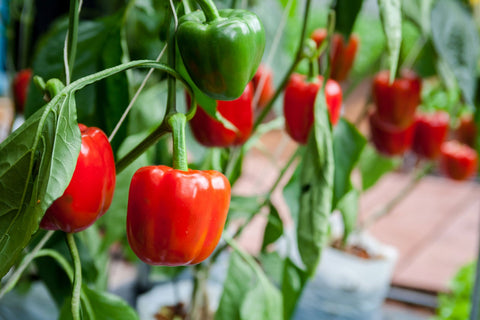
Supporting the Plants
Pepper stems can be brittle and may break under the weight of developing fruits. Provide additional support with small tomato cages or wooden stakes. Pinch off the top leaves when the plant reaches a height of 6 to 8 inches to encourage more lateral branching, resulting in a shorter, sturdier plant with more fruit-bearing side branches.
Mulching Strategies
A thick layer of mulch suppresses weed competition, conserves water, regulates root zone temperature, and ultimately enriches the soil. However, mulch can also provide a habitat for destructive pests like slugs, snails, and insects that may harm young pepper plants. Wait until the seedlings reach a few inches in height before adding 3 to 4 inches of natural mulch, such as composted leaves, bark mulch, straw, or wheat straw. If opting for wheat straw, ensure the bales are seed-free, or you'll need to weed out wheat seedlings from the garden a few weeks after mulching.

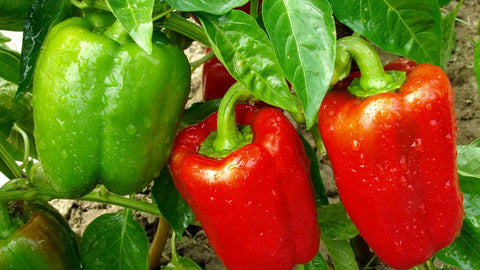
Harvesting Bell Peppers
Bell peppers can be harvested green or when fully colored. Green peppers tend to have a more robust flavor, while colored fruits are sweeter and more developed. Regular harvesting encourages more flower and fruit development—the more you pick, the more you get. Always use sharp hand pruners, scissors, or shears to harvest peppers. Attempting to twist or break fruits off the stem is almost certain to damage the plant.
In conclusion, the best-tasting bell peppers are those consumed fresh from the garden. While bell peppers can last about a week in the refrigerator, extended refrigeration may cause wrinkling and shriveling of the skin. Freezing bell peppers is the best way to preserve a bountiful harvest that lasts more than a week.


