
As December unfolds, gardens may be tucked away under blankets of snow, and the vibrant blooms of summer may seem like a distant memory. However, there's a charming way to preserve a piece of your garden's beauty that goes beyond photographs and dried flowers. DIY December plant pressing offers a creative and nostalgic activity that allows you to capture the essence of your garden in a timeless and artistic way. In this blog, we'll guide you through the process of DIY plant pressing, turning your botanical treasures into unique keepsakes that will brighten up the winter season and evoke memories of warmer days.
1. Selecting the Perfect Plants
Choosing Seasonal Foliage:
While flowers may be scarce in December, there's an abundance of evergreen leaves, berries, and dried seed heads that can be pressed with excellent results. Consider incorporating foliage from plants like holly, pine, juniper, and rosemary, as well as any dried flowers or seed pods that may still linger in your garden.
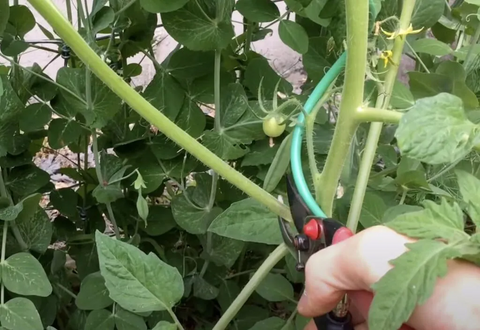
Harvesting with Care:
When selecting plants for pressing, use sharp scissors or pruning shears to ensure clean cuts. Harvest plants during a dry period to avoid excess moisture, which can impact the pressing process. Choose specimens that are at their peak but not overly mature.
Mixing Textures and Colors:
Create visually interesting compositions by selecting a variety of textures and colors. Combine different types of leaves, berries, and seed heads to add depth and complexity to your pressed botanical arrangements. Experiment with contrasting shapes and sizes for a dynamic effect.
2. Gathering Materials for Plant Pressing
DIY Plant Press:
Create a simple and effective plant press using materials readily available at home. Two sturdy wooden boards, cardboard, and several sheets of absorbent paper (like newsprint or blotting paper) are the basic components. You'll also need strong straps or belts to secure the press.
Absorbent Paper:
The choice of absorbent paper is crucial for successful plant pressing. It should be able to absorb moisture effectively, aiding in the drying process. Newsprint, blotting paper, or even paper towels can be used. Ensure you have enough sheets to layer between your plants.
Sturdy Backing Boards:
The wooden boards act as the sturdy backing for your plant press. They should be large enough to accommodate the size of the specimens you plan to press. Ensure the boards are smooth and free from any rough edges that could damage the plants.
Straps or Belts:
Secure your plant press with strong straps or belts. This ensures even pressure across the press, aiding in the flattening and drying of the plants. Make sure the straps are tightened adequately but not excessively to avoid damaging the specimens.
3. The DIY December Plant Pressing Process
Arranging the Specimens:
Lay out your chosen plant specimens on absorbent paper, arranging them in a way that showcases their natural beauty. Consider creating themed arrangements or mixing various plants for a diverse display. Leave enough space between specimens to ensure they are pressed evenly.
Layering with Absorbent Paper:
Place sheets of absorbent paper between the arranged plant specimens. The paper helps absorb moisture, facilitating the drying process. Ensure that each specimen is well-covered, and add additional layers as needed. Pressing multiple layers simultaneously is efficient and conserves space.
Securing in the DIY Press:
Carefully transfer the arranged specimens and absorbent paper layers onto one of the wooden boards. Place the second board on top, creating a sandwich with the plant material in the middle. Use straps or belts to secure the press tightly. This step is crucial for achieving flat and well-preserved plants.
Finding the Right Drying Location:
Choose a dry and well-ventilated location for your plant press. The pressing process typically takes several weeks, and ensuring proper airflow contributes to effective drying. Avoid areas with excessive humidity, as this can slow down the drying process.
4. The Art of Patience
Waiting for the Magic to Happen:
The magic of DIY plant pressing lies in the patience to let nature take its course. Allow the press to work its magic over the coming weeks. Depending on the thickness and moisture content of the plants, the drying process may take anywhere from two to six weeks.
Regular Checkups:
Periodically check on your pressed specimens. If the absorbent paper becomes saturated, replace it with fresh, dry paper. Tighten the straps if necessary to maintain even pressure. Patience and attention to detail during the drying process ensure the best results.
5. Creating Botanical Art
Unveiling Your Pressed Plants:
Once your plants are thoroughly dried, carefully remove them from the press. You'll be greeted with beautifully flattened specimens that retain their natural colors and intricate details. Handle them with care to avoid any breakage.
Arranging and Framing:
Get creative with arranging your pressed plants. Frame them in shadow boxes, on blank canvas boards, or between sheets of glass. Experiment with compositions that showcase the uniqueness of each specimen. The result is a stunning piece of botanical art that captures the essence of your garden.
Labeling and Documenting:
For an added personal touch, consider labeling each pressed specimen with its common and scientific names, as well as the date of pressing. This not only adds an informative element but also serves as a record of your garden's beauty during that specific season.
6. DIY December Plant Pressing Projects
Creating Greeting Cards:
Use your pressed specimens to create unique greeting cards. Arrange the pressed plants on cardstock, add a heartfelt message, and send a piece of your garden to friends and loved ones during the holiday season.
Decorating Candles and Ornaments:
Enhance candles or ornaments with pressed plant designs. Adhere the pressed plants to the surface using clear glue or Mod Podge. This DIY project adds a touch of nature to your holiday decorations.
Making a Botanical Journal:
Start a botanical journal or scrapbook where you can document each pressed plant specimen along with notes on its origin, blooming season, and any special associated memories. This creates a personalized keepsake filled with garden memories.
Conclusion
DIY December plant pressing is a delightful and meaningful way to preserve the beauty of your garden and bring a touch of nature indoors during the winter months. Whether you choose to frame your pressed specimens, create unique projects, or simply revel in the art of botanical preservation, this hands-on activity connects you with the beauty of the natural world. As you embark on this DIY adventure, let the process be a reflection of your patience and appreciation for the intricate details found in the plants that graced your garden. Celebrate the season, cherish your botanical treasures, and revel in the memories preserved in each pressed leaf and petal.


